 Blaine Siding
 Building New in Everson: What the Climate Actually Asks of Your Windows
Everson sits inland from Blaine but still squarely inside the weather pattern that defines Whatcom County construction: wet winters, wind-driven rain off the Strait and the lowlands, and a moss and algae season that runs longer here than almost anywhere else in the state. If you're framing a new home or outbuilding in this area, the window installation stage is one of the few points in the build where a mistake gets buried behind siding and trim — and doesn't show up again until a wall starts staining, sagging, or rotting from the inside out, often years later. New-construction windows aren't just "windows installed in a new house." They're a specific installation method, and getting that method right matters more here than in drier parts of the state.
This page is about that one job — installing new-construction windows correctly in an Everson-area build — not a general window buying guide. If you're weighing whether to build with new-construction units at all versus retrofit-style inserts, or you want to understand what a correct install actually involves before your framing crew closes the walls behind it, this is written for you.
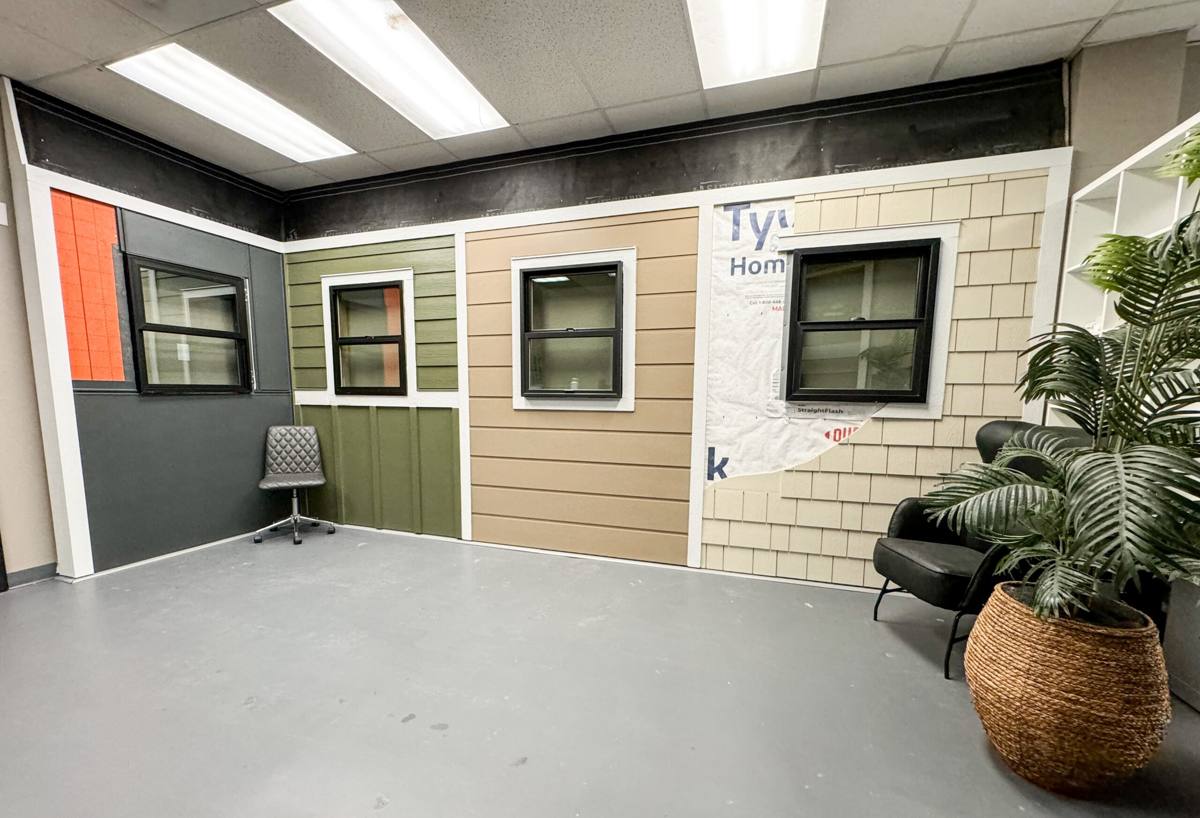
New-Construction vs. Replacement Windows: Why the Distinction Matters
New-construction windows come with a nailing fin (also called a nail flange) around the perimeter of the frame. That fin is what gets integrated into the weather-resistive barrier (WRB) and flashing system before siding goes on. Replacement or "pocket" windows, by contrast, are built to slide into an existing rough opening without disturbing the surrounding wall — they rely on the existing flashing and cladding already being sound.
On a new build, there's no reason to use a replacement-style window, and doing so would actually work against you — you'd lose the ability to properly flash the fin into the housewrap, which is your primary defense against wind-driven rain intrusion. The trade-off is that new-construction installation has to happen in the right sequence, at the right point in the framing schedule, with the right materials layered in the right order. Get that sequence wrong and the fin becomes a rain-collection shelf instead of a rain-shedding one.
Where This Goes Wrong on Real Job Sites
- Housewrap installed over the nailing fin instead of the fin taped over the housewrap at the sides and top, reversing the shingle-lap and letting water track behind the wrap
- No sill pan flashing under the rough opening, so any water that does get past the window has nowhere to drain except into the framing
- Sealant used as the only defense instead of mechanical flashing — sealant fails long before flashing does, and it fails invisibly
- Rough openings cut too tight or too loose, leaving no consistent shim space for the window to be set plumb, level, and square
- Trim and cladding installed tight to the window frame with no drainage gap, trapping moisture against the frame
What the Whatcom County Climate Does to a Poorly Installed Window
Everson doesn't get hurricane-force wind, but it gets a steady diet of moisture pushed sideways by wind off the lowlands and the Strait, plus long stretches of overcast, damp weather that never really lets a wall assembly dry out between rain events. Add proximity to salt air carried inland from the coast, and you've got three separate stresses acting on a window opening at once.
| Climate Factor | What It Does | What the Install Needs |
|---|---|---|
| Wind-driven rain | Pushes water sideways and upward under trim and siding laps, not just straight down | Proper shingle-lap flashing sequence, sill pans, and head flashing — not sealant alone |
| Salt-tinged air (coastal proximity) | Accelerates corrosion of untreated fasteners and some metal flashing/hardware | Corrosion-resistant fasteners and flashing rated for coastal exposure |
| Long moss/algae season | Organic growth holds moisture against sills, trim, and low-slope surfaces | Sloped sills, drainage gaps behind trim, and finishes that don't trap standing moisture |
| Extended damp periods with little drying time | Wall assemblies stay wet longer once water gets in | A drainage plane and flashing system that sheds water out, not one that merely resists it |
What a Correct Installation Sequence Looks Like
There's no shortcut version of this that still performs. The order matters as much as the materials:
- Rough opening is checked for square, level, and correct dimensions before the window ever shows up on site
- A sloped sill pan flashing is installed at the bottom of the opening, with the slope directed outward so any water that reaches it drains away from the framing, not toward it
- Housewrap is cut and folded into the opening ahead of the window going in
- The window is set into the opening, shimmed plumb, level, and square, and fastened through the nailing fin per the manufacturer's schedule
- Flashing tape goes over the side fins first, then the head flashing last, so every layer above sheds onto the layer below it — the same shingle-lap logic as a roof
- Sealant is used at specific points the manufacturer calls for, as a secondary defense, never as the only line of defense
- Siding and trim are held off the window frame with enough of a gap to let water that does reach that plane drain and dry, rather than sitting against the frame
A Practical Checklist for Homeowners and Builders
- Ask whether sill pan flashing is included as standard practice, not an upcharge
- Confirm the flashing sequence follows shingle-lap order (sides taped before the head)
- Verify fastener and flashing materials are rated for coastal/salt-air exposure, not just a generic spec
- Check that rough openings are being verified before windows arrive, avoiding field modifications that compromise flashing
- Make sure trim details include a drainage gap rather than sealing trim flush against the frame
Frame Material Considerations for This Climate
The frame material you choose doesn't change the installation fundamentals above, but it does affect long-term maintenance in a damp, moss-prone climate like this one.
| Frame Material | Moisture Behavior | Maintenance in This Climate | Typical Trade-Off |
|---|---|---|---|
| Vinyl | Doesn't rot or corrode; dimensionally stable when installed with proper expansion allowance | Low — occasional cleaning of sills and tracks where moss and algae can collect | Lower upfront cost; frame color/finish options more limited than fiberglass |
| Fiberglass | Very stable across temperature swings; resists moisture-related warping | Low — similar cleaning needs to vinyl | Higher upfront cost; strong long-term value in wet, variable climates |
| Aluminum-clad wood | Wood core protected by cladding, but any breach in the cladding or seal exposes wood to rot | Higher — seams and cladding joints need periodic inspection | Traditional look; more installation sensitivity around flashing and sealant details |
We don't push homeowners toward one frame material across the board — the right call depends on budget, the look you're after, and how much long-term maintenance you want to take on. Where we do hold a hard line is on the installation method underneath whatever frame you choose: the flashing and drainage details matter more than the frame material itself when it comes to keeping water out of the wall.
How We Handle New-Construction Window Work in Everson
On a new build, we're one piece of a sequence that includes your framer, your siding crew, and often a general contractor coordinating the schedule. Our part of that sequence looks like this:
- Rough opening verification — we check every opening against the window schedule before installation day, not after
- Flashing and sill pan work — done to the manufacturer's specifications, which is also what preserves the window's warranty
- Setting and fastening — plumb, level, square, and fastened per the schedule that keeps the frame from racking over time
- Documentation of the flashing sequence — useful if a building inspector wants to see it before siding closes it up, and useful for you to have on record
- Coordination on timing — windows go in at the point in the framing schedule where the WRB is on but siding hasn't started, so the sequence above can actually happen in order
We work directly with builders and GCs on new construction in and around Everson and the broader Blaine area regularly enough to know how local framing crews sequence a job, what Whatcom County inspectors tend to look for at the dry-in stage, and how to keep the window install from becoming the bottleneck on your schedule.
Cost Factors on a New-Construction Window Job
Pricing on new-construction window installation depends on more than the number of openings. Broadly, the factors that move the number are:
| Factor | Why It Affects Cost |
|---|---|
| Number and size of openings | More flashing, more labor hours, more material per opening |
| Frame material chosen | Vinyl, fiberglass, and clad-wood units carry different material costs |
| Wall height and access | Second-story and vaulted openings require staging or lift access |
| Flashing complexity | Openings near rooflines, decks, or wall transitions need extra detailing |
| Scheduling coordination | Tight builder timelines can require crew scheduling around other trades |
We don't quote a flat per-window number sight unseen — a set of openings on a simple gable wall is a different job than openings tucked under roof transitions or near deck ledgers, and the honest number reflects that.
Why Hiring a Crew That Already Works This Area Matters
New-construction window installation isn't exotic work, but it's unforgiving work — every mistake gets covered by siding within days and doesn't announce itself for years. A crew that installs windows across a range of climates might default to a generic flashing detail that's fine in a drier region and inadequate here. A crew that works Everson, Blaine, and the rest of Whatcom County routinely sees what wind-driven rain and a long wet season actually do to a wall assembly over time, and builds the flashing sequence around that reality rather than a manufacturer's minimum spec written for a national market.
That local pattern recognition is also what keeps a job moving — knowing how Whatcom County inspections tend to go at the dry-in stage, how local framers typically size rough openings, and what details tend to cause callbacks later in this specific climate.
If you're framing a new build or addition in the Everson area and want the window installation done right the first time, we're glad to walk the plans with you and give you a straightforward, no-pressure estimate — just fill out the form below.